


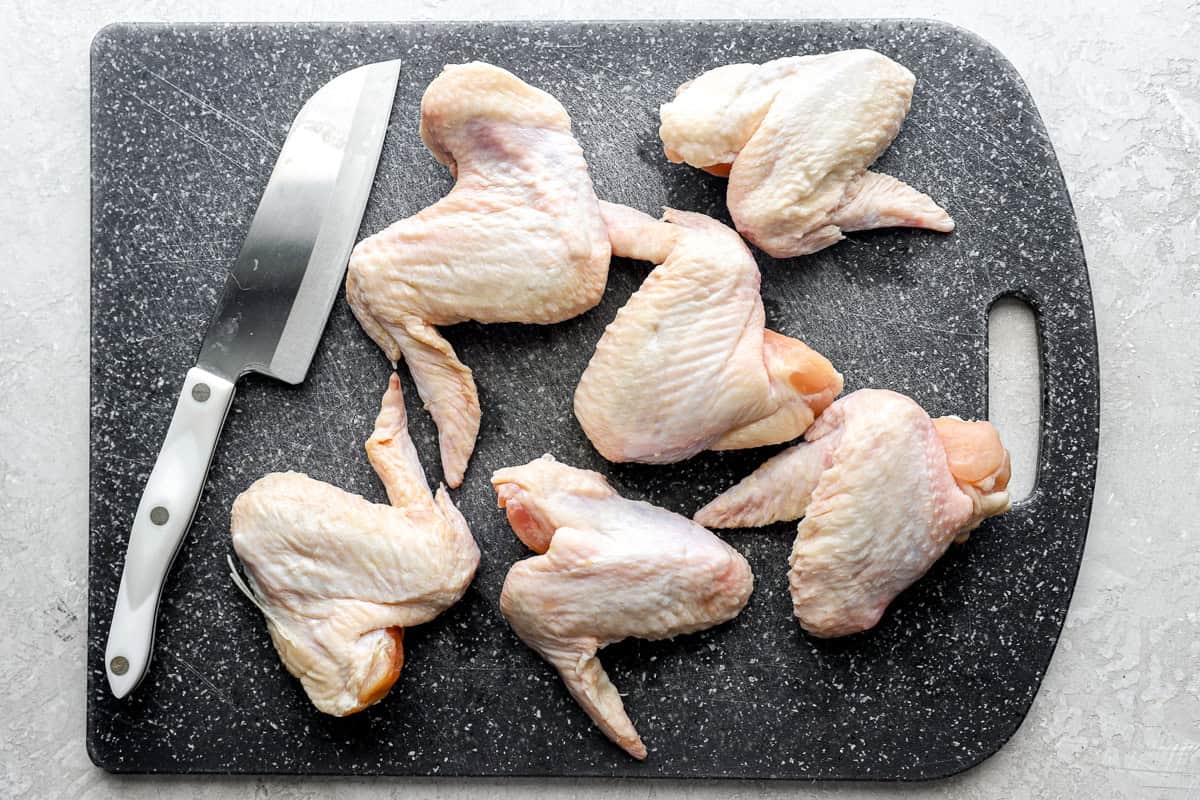
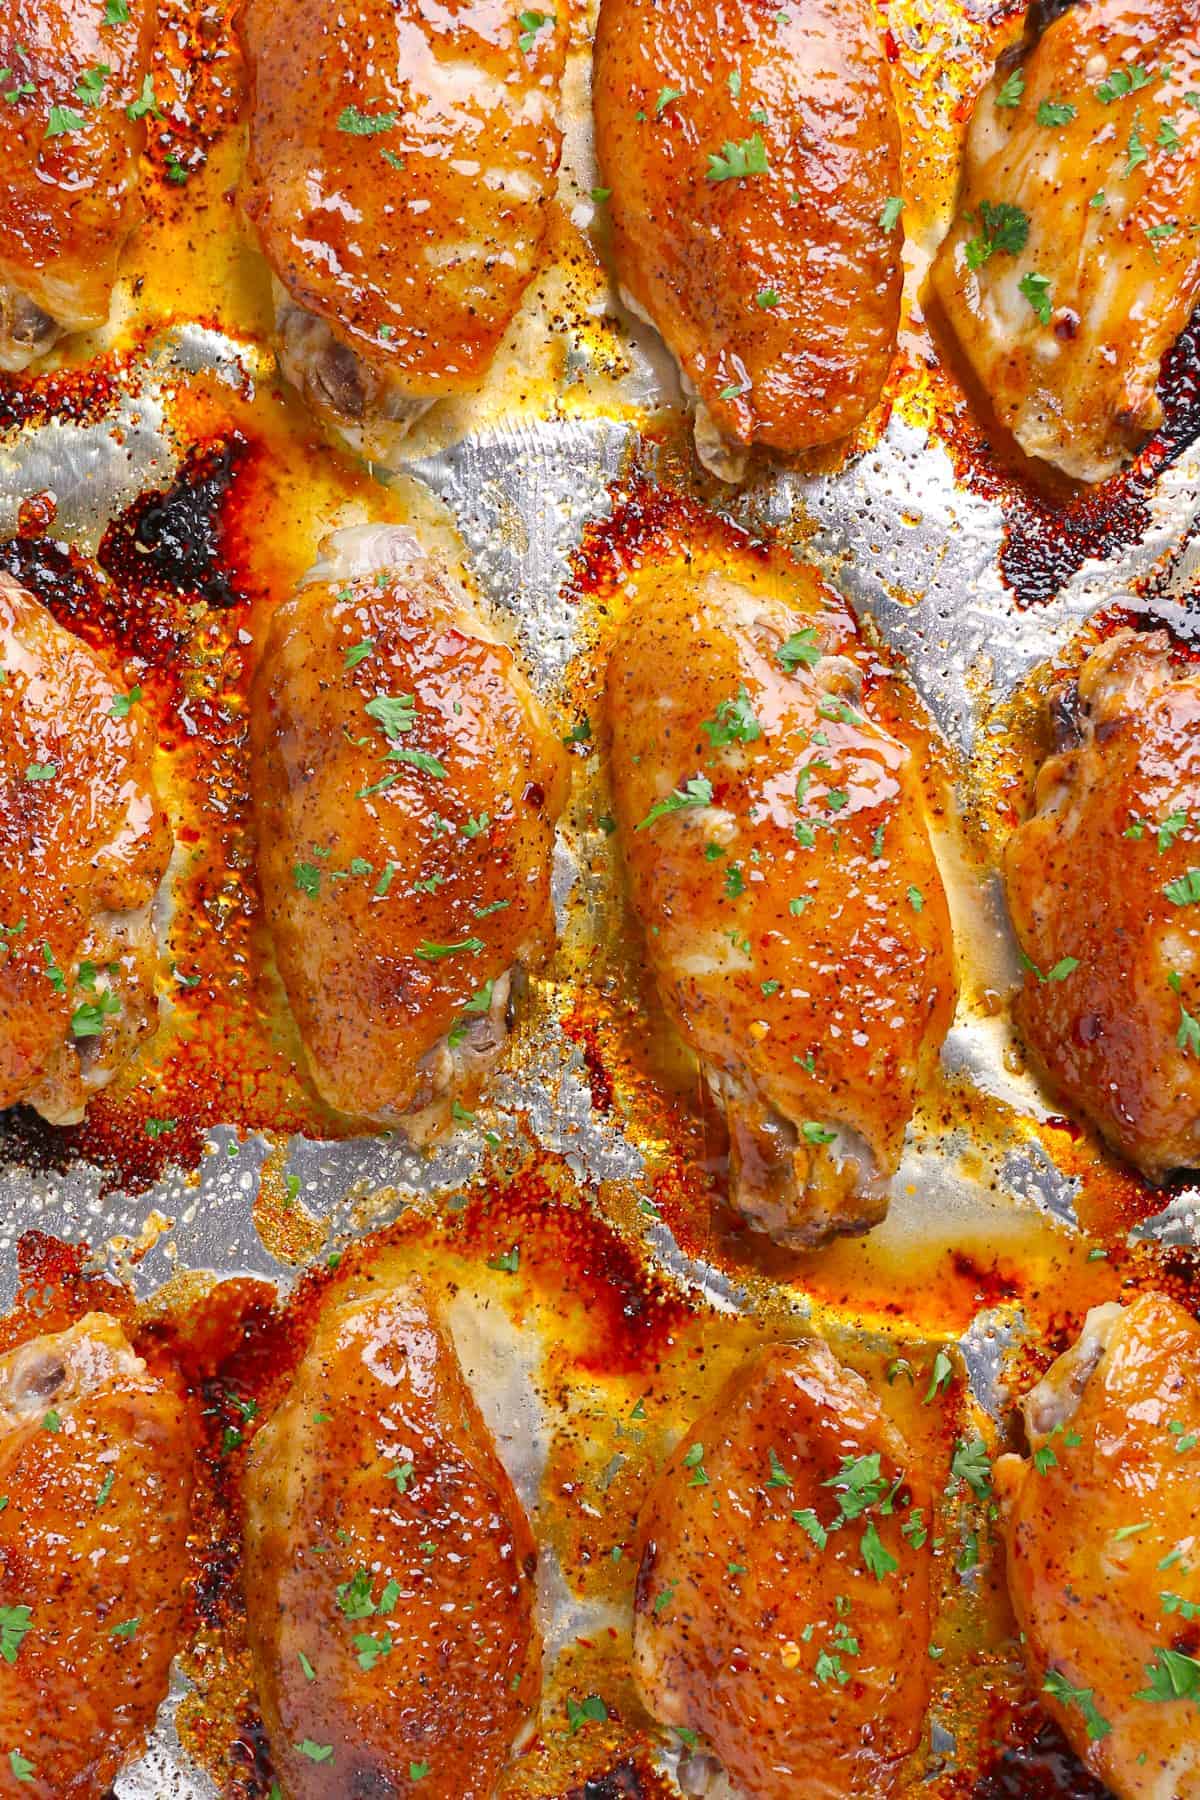
Learning how to cut chicken wings into parts is easier than I thought! Whether you’re prepping them for Buffalo wings, grilling, or baking, separating whole chicken wings into drumettes and wingettes (flats) is a simple skill every home cook can master. With just a sharp knife or poultry shears, I’ll show you how to break down chicken wings in minutes to get them ready for all your favorite recipes.

Separating Whole Chicken Wings
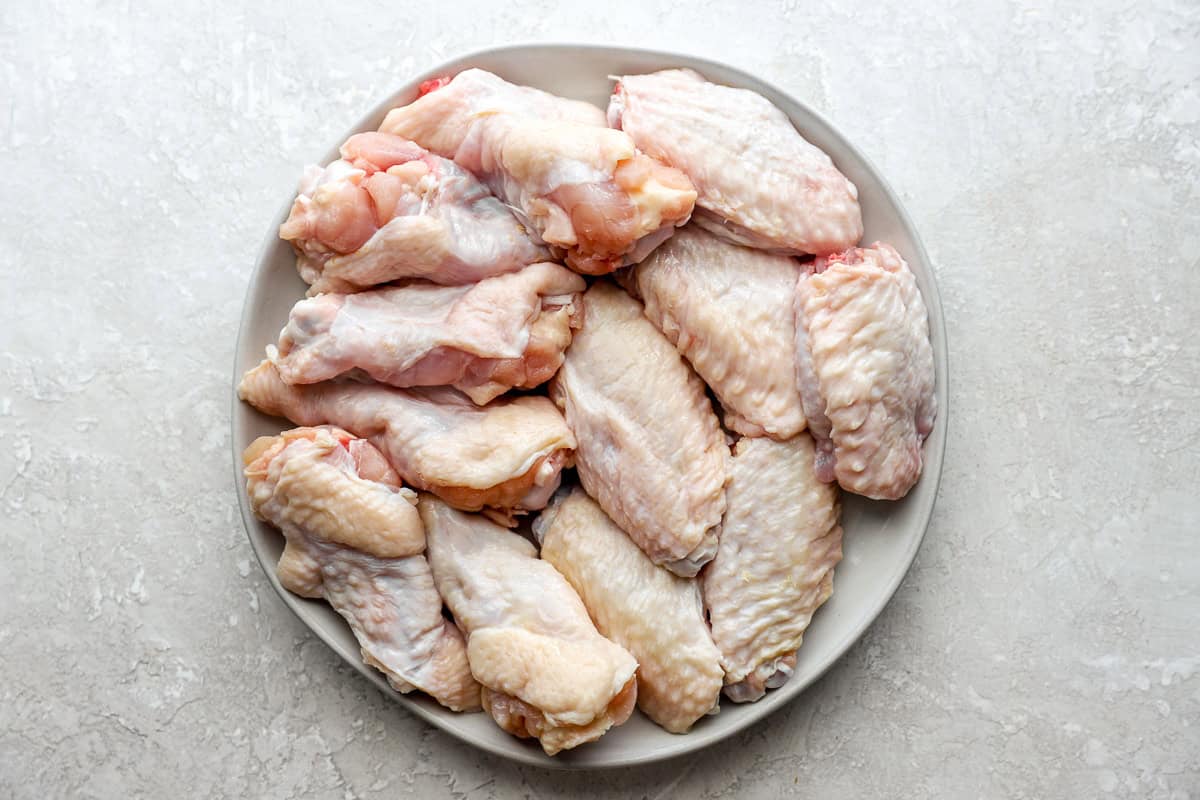
After years of making big batches of chicken wings for my annual Super Bowl Party, I found that buying whole wings is way more affordable than pre-cut ones. Breaking down a whole chicken was easy enough, so I learned how to cut chicken wings myself too. And I’ve saved so much money, while also getting better results!
The secret to breaking down chicken wings into parts is finding the joints and cutting through them, instead of trying to saw through bone. Just remove the wing tips, then separate the drumettes from the flats. Voila! Once you’ve done a couple, you’ll see how simple it is, and the whole batch will be ready in no time.

Email this recipe
Enter your email and we’ll send the recipe directly to you!
By submitting this form, you consent to receive emails from Easy Chicken Recipes.
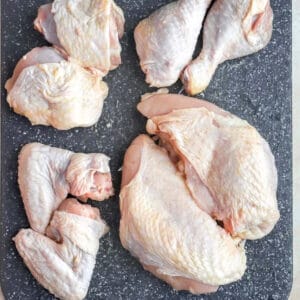
Chicken Wing Parts
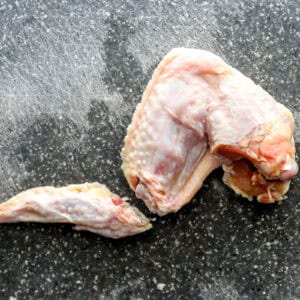
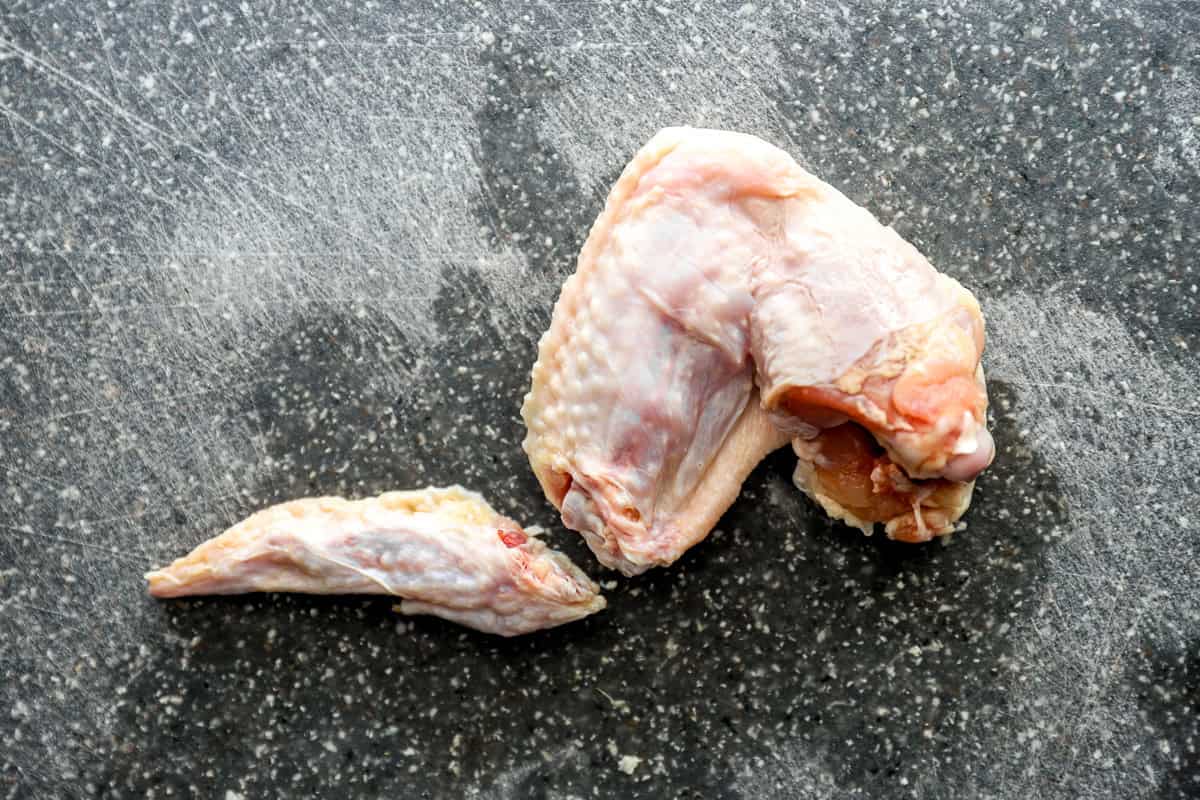
For this easy process, it’s important to know some basic chicken wing anatomy. Each wing has three parts:
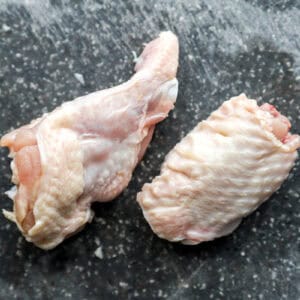
- the drumette: this is the meaty piece that connects to the rest of the chicken. Once separated, it looks kind of like a mini drumstick.
- the wingette or flat: this is the middle part of the wing, with plenty of meat between two pieces of bone.
- and the wing tip: this is the end piece, made up mostly of bone and skin, with almost no meat. This part is rarely used to make chicken wings, but they can be saved and used to make broth or stock!
How to Cut Chicken Wings
Equipment
- Cutting Board
- Sharp Kitchen Knife or Poultry Shears
Ingredients
- bone-in, skin-on chicken wings
Instructions
- Begin with whole chicken wings, a cutting board, and a sharp knife. Work with one wing at a time.bone-in, skin-on chicken wings

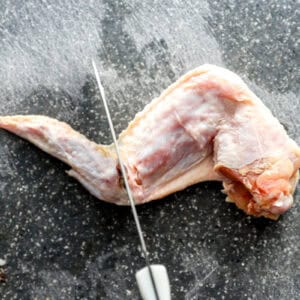
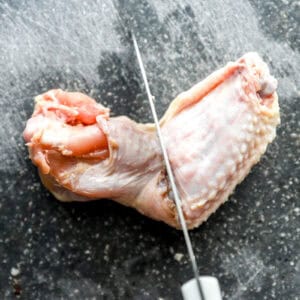
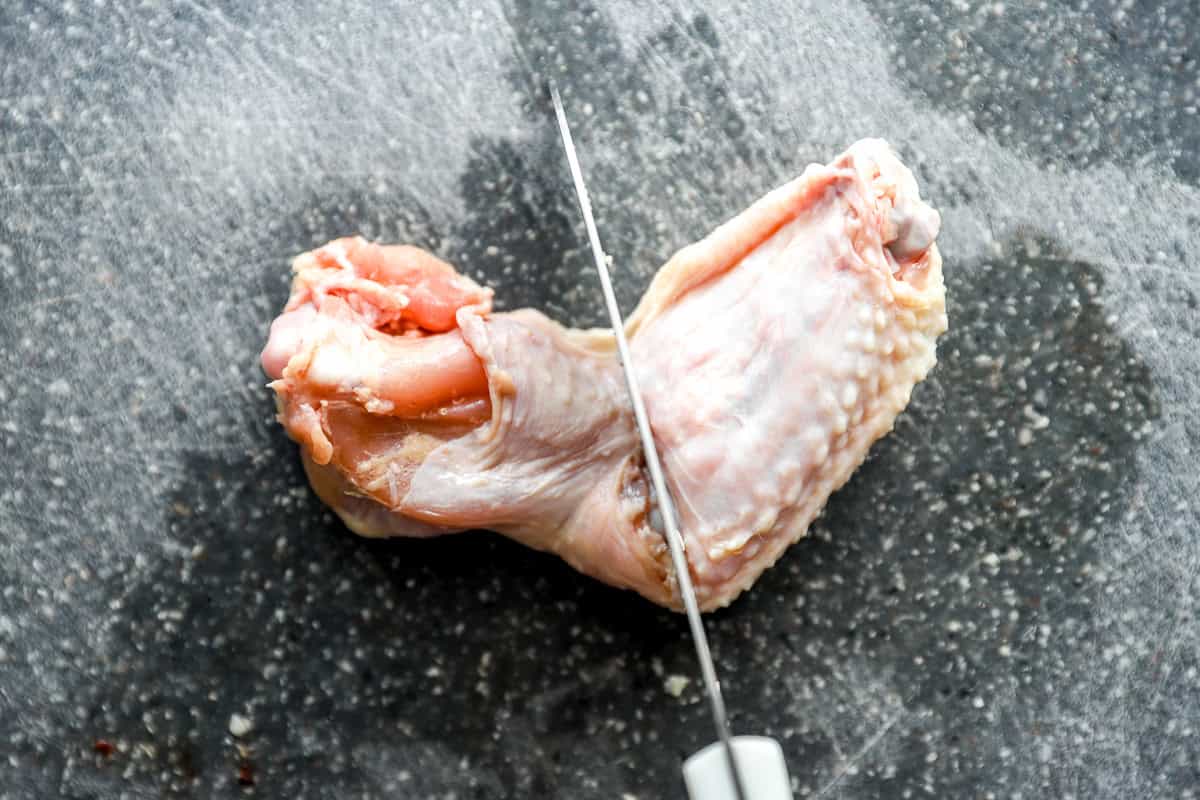
- Flip the wings over so the skin side is down. Find the joint between the wing tip and the wingette.
- Using a kitchen knife, slice through this part. Use the palm of your hand to press down on the knife to make the cut all the way through. Discard the wing tips.
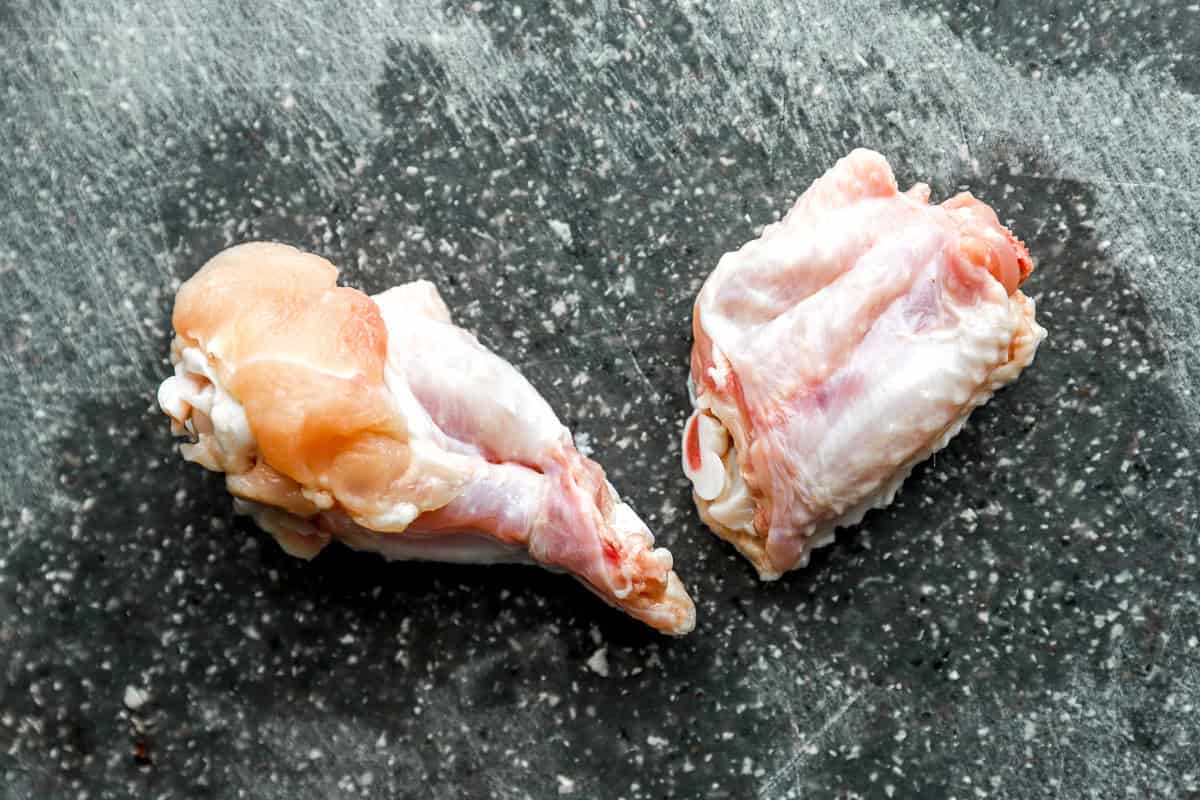
- Find the joint between the wingette and the drumette.
- Use your knife to slice through this part, pressing down again firmly with your palm on the knife to cut all the way through, creating two parts.
- Repeat with all remaining wings.
Notes
- I recommend using poultry shears if you have them. It is much quicker and easier to cut through joints with shears vs. a knife. Otherwise, use a good quality, sharp Chef’s knife.
- Use a large cutting board with a damp towel underneath to prevent slipping.
- Pat the wings dry before cutting. This will make them less slippery and safer to handle.
- Feel for the joint before cutting. Wiggle the wing a little to find where it bends naturally–that’s the spot to cut.
- Cut straight through the joint, not the bone. If you meet resistance, adjust your angle slightly until you hit the soft joint.
- Save the tips! Even though you don’t cook them for wings, they’re great for making homemade chicken stock.
- Work in batches. If you’re cutting a lot of wings for a party, separate them all at once before cooking so prep goes faster.
- Always wash your hands, knife, and cutting board thoroughly after handling raw chicken to avoid cross-contamination.
Note: Water, salt, pepper, oil, and broth are not counted as ingredients on this site.
Safety First!
One of the most important things I’ve learned over the years is that safety starts with your prep space. Always pat the chicken wings dry before cutting so they’ll be less slippery and easier to handle. I also recommend placing a damp towel under your cutting board to keep it from shifting. Finally, make sure you’re using a sharp knife or poultry shears. A dull blade is more likely to slip and cause an accident.
How to Cut Chicken Wings into Drums and Flats Step by Step
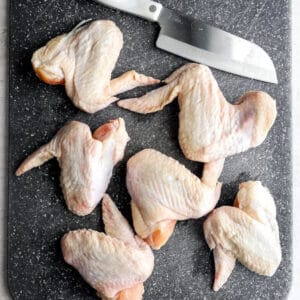
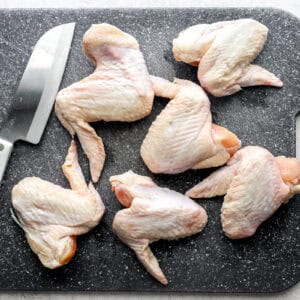
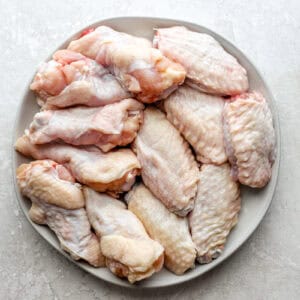
Prep: Grab a bag of whole bone-in, skin-on chicken wings. When buying whole wings, keep in mind that however many you start with, you will end up with double the amount in wing flats and drums–so plan accordingly. Secure your cutting board and pat the wings dry so your knife doesn’t slip while you work.
Locate the Wing Tip Joint: Work through these steps one wing at a time. Flip the wing over so the skin side is down. Find the joint between the wing tip and the wingette. To locate the joint, wiggle the wing a little to find where it bends naturally. That’s where you want to cut.

Cut the Wing Tip Off: Using a kitchen knife, slice through the joint, not the bone. Use the palm of your hand to press down on the knife to make the cut all the way through. Discard the wing tips, or save them to use in your next batch of chicken stock.
Locate the Wing Joint: Next, find the joint between the wingette and the drumette.
Cut into Flats and Drums: Use your knife to slice through this part, pressing down again firmly with your palm on the knife to cut all the way through. You will now have one flat and one drum.
Cut All Wing Parts: Repeat the process of separating wing parts with all remaining whole chicken wings. Now they’re ready to cook or store!

How to Store, Freeze, and Reheat
Store raw wing portions in an airtight container in the refrigerator for up to 2 days, or in the freezer for up to 3 months. Once cut into parts, season, cook, and use wings as desired.


Leave a Reply